
Blogging has led to prevalent implies of self-expression, sharing information, and interfacing with like-minded people worldwide. It offers various benefits, and utilizing the blogger stage can be particularly invaluable for tenderfoots because of its user-friendly nature. Here is a clarification of the offer of blogging and the benefits of utilizing bloggers:

- Inventive outlets and self-expression
Blogging provides an imaginative outlet for people to precisely understand themselves and share their considerations, encounters, and abilities at different points. It permits bloggers to exhibit interesting voices and viewpoints, cultivating imagination and individual development.
- Community-building and networking
Blogging empowers people to enter a different community of users who share a comparable interface. It provides openings to lock in dialogs, receives criticism, and constructs connections with perusers and individual bloggers. Bloggers encourage simple interactions and engagement through comments and social sharing.
- Information sharing and skills
By creating a web journal, people can share their information, aptitudes, and encounter a wide gathering of people. Bloggers make it basic to distribute and organize substances, making them available to perusers looking for data or directions on particular points.
- User-Friendly Interface
Bloggers are known for their beginner-friendly interface and natural plans. This stage offers a direct and easy-to-use editor, permitting clients to form and distribute web journal posts without specialized ability or coding information. A user-friendly interface guarantees that the fledglings can easily explore the stage.
- Fast Setup and Customization
Bloggers streamline the web journal setup, making it speedy and hassle-free. It offers a run of customizable layouts and topics, permitting bloggers to personalize the appearance of their blogs without any planning abilities. Clients can effortlessly alter the format, textual styles, and colors, and include header pictures to coordinate their preferences and branding.
- Integration with Google Services
As Blogger may be a Google item, it consistently coordinates with other Google administrations, such as Google Analytics, making it simpler to track and analyze web journal activity, client engagement, and execution. This integration disentangles the method of implementing essential apparatuses for blog management and optimization.
- Dependable and Secure:
Bloggers can be a dependable stage facilitated by Google, guaranteeing the solidness and security of your web journal. The stage handles server upkeep, security overhauls, and reinforcements, permitting bloggers to center on making substances instead of specializing in viewpoints.
- Cost-effective Arrangement.
Bloggers offer their administrations without charge, making it a perfect choice for tenderfoots who need to begin blogging without contributing to facilitating or space enrollment. This cost-effective arrangement allows people to investigate blogging without monetary constraints.
In general, the request for blogging lies in its ability to supply a stage for self-expression, community engagement, information-sharing, and individual development. Utilizing a logger as a tenderfoot offers a user-friendly encounter with its instinctive interface, customization alternatives, and integration with Google Services. Whether you are a hobbyist, an energetic essayist, or a yearning influencer, bloggers can be an awesome starting point for your blogging travel.
Create Blog on Blogger?
Step 1: Sign up and log in to Blogger.
- Visit the Blogger site (www.blogger.com) and press on the "Make Your Blog" button.
- You will be sent to a Google sign-in page. If you now have a Google account, enter your login qualification. On the off chance that not, tap on the "Make account" alternative and take after the steps to make an unused Google account.
- Once you are marked in, you will be taken to the blogger dashboard.
Step 2: Make a modern web journal.
- On the Blogger dashboard, click the "Unused Web journal" button.
- A pop-up window appeared. Enter a title for your web journal within the "Title" field.
- Select a special URL for your web journal within the "Address" field. Undoubtedly, this will be the domain title of your web journal (e.g., myawesomeblog.blogspot.com). Choose a URL that reflects the blog's theme or title.
- Select a layout from the accessible choices. You will be able to continuously alter it afterward, on the off chance that you want.
- Once you have filled in the required data, tap on the "Make web journal" button.
Step 3: Customize your web journal.
- After creating your web journal, you will be diverted to the blogger dashboard for that particular web journal.
- To customize the appearance of your web journal, click on the "Theme" option within the clear-out menu.
- You will be able to select from an extension of pre-designed layouts or press on "Customize" to modify different angles, such as colors, textual styles, format, and more.
- Use the options in the clear-out menu to explore diverse customization settings and make craved changes.
- Once you have fulfilled the customization, tap on the "Apply to Web journal" button to spare your changes.
Step 4: Create your to begin with web journal post.
- From the Blogger dashboard, press on the "Posts’ alternative in the clear-out menu.
- By default, you can see a test web journal post. To create an unused one, press the "Modern Post" button.
- An unused page will open, allowing you to enter the title and content of your blog post.
- You will be able to utilize the formatting alternatives at the best of the editor to fashion your content, embed pictures, make hyperlinks, etc..
- Once you have wrapped up the composing web journal post, tap on the "Distribute" button to form it live on your blog.
Step 5: Oversee your web journal.
- Use different choices within the logger dashboard to effectively manage your blog.
- From the dashboard, you can alter, erase, or plan posts, see and direct comments, screen web journal activities and measurements, include or evacuate pages, and customize different settings.
- Investigate the different highlights and settings accessible to upgrade your Web journal and make it more locked in for your perusers.
- That's it! You have presently made a web journal on Blogger and distributed your post. Keep in mind to routinely overhaul your web journal with a new substance to keep your group of onlookers locked.
Install Blogger Template or Theme
Step 1: Discover a layout.
Step 2: Download the format.
Step 3: Sign int o Blogger.
Step 4: Get to the topic settings.
Step 5: Reinforcement your current topic (discretionary)
- Some time recently, introducing a modern format, it is suggested to reinforce your current topic in case you need to return to it.
- Tap on the "Backup/Restore" button in the right corner of the subject page.
- Within the popup, tap on the "Download Subject" button to spare duplicates of your current theme to your computer.
Step 6: Introduce the new template.
Step 7: Customize the format.
- After the template is effectively transferred and introduced, you will be able to customize it for enjoyment.
- Utilize the choices within the clear menu to alter the template's layout, colors, textual styles, and other settings.
- You will be able to see the changes by clicking on the "See" button or apply them straightforwardly by clicking on the "Apply to Web journal" button.
Buy a Domain Name? - from Namecheap.
What is Namecheap?
Steps to purchase a space title from Namecheap.
- The primary step was to obtain a markdown coupon.
- Discover the space you need to purchase.
- Make a unused account and choose your payment strategy.
1- The primary step is to obtain the markdown coupon.
2- Discover the space you want to purchase


- In case the domain you are looking for is accessible, press include to cart, add to cart following to the space.
- If the space with the expansion you're trying to find isn't accessible, you will discover that the space is accessible for deal, you'll press make an offer to see the cost to purchase this space, or the space is not accessible at all and you need to look a modern space or the same space with another extension
- Within the to begin with section of the look results, you will too discover a few proposed comes about for a few spaces and expansions related to the space you're looking for.
- After that, you'll discover the comes about that include the domain with the foremost important extensions, available or not available
- After choosing the space with the expansion you need and it is accessible, click Add to Cart to include to cart
- After that, click View Cart to enter the cart on Namecheap.

- Sort the coupon or discount code in the indicated put, at that point press on apply to activate the coupon.
- After enacting the coupon, survey your shopping cart and in the event that you want to buy extra services, and after completion, click on affirm the buy prepare.
3- Create a modern account and select a payment method

- Visa and MasterCard cards, and what recognizes Namecheap is that it acknowledges all sorts of Visa and MasterCard prepaid cards, coordinate charge and credit.
- Paypal is the foremost popular electronic bank.
- Your account funds are in your account reserves, which you can best up through Visa, MasterCard, PayPal, Bitcoin, and other advanced monetary forms.
- Choose the payment method that is right for you and here we are going choose PayPal to complete the checkout process, then click continue.
After that, you will enter the installment confirmation page, press pay with paypal to enter your PayPal account and complete the installment prepare.

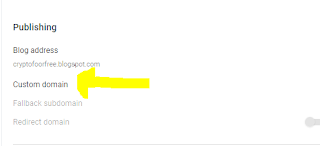
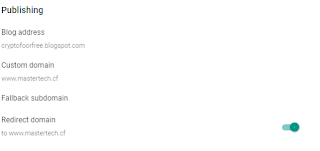
Connect Namecheap domain to blogger blog.
We offer you an explanation to link Namecheap domain to Blogger blog 100% correctly and smoothly, so that you can run the domain on your blog normally.
I have previously explained in detail a topic on how to buy a Namecheap domain name, and this topic is about how to link Namecheap domain to a Blogger blog in detail and in the same way as I did for my blog.
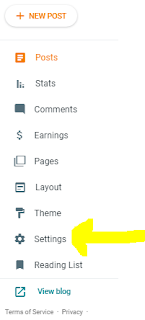
1- go to the blog board you want to link the domain to in Blogger.
2- Second, click Settings,


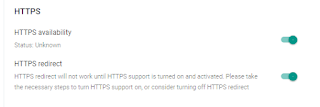
13- Go to the site to make sure it is working normally
Add content to your website.
At first, you should focus on specific content in working on it on the site regarding your publications that you will publish. AdSense policies we will choose, for example, the topic of news first, I will divide the pages of the site as follows.
Go to blogger dashboard and choose Pages. I will choose the following titles , we will create the following pages.
- Privacy policy
- About the site
- call us.

Click on the New Page option.

- We write the first title for the first page, and it is the privacy policy page. You can search in Google for any of the ready-made pages. There are kefir sites that provide this service for free. We write the address and write the content of the privacy policy as shown, taking into account the format and coordination in writing.
You can use this website that provides this service privacy policy generator
We write the text that is generated on the site you talked about, we paste it as shown, we save the page as the privacy policy.

Now we create the following page with the name About the site, whose content comes here to you and the content of the site in general in a simple and less nonsense way.

Now we are creating a page to contact us via a specific code that will be pasted on one side html As follows.


We choose the next option for the pages, which will automatically appear to you with this beautiful template as follows.


how to compose in blogger
1- Select the correct title for your article
2- Include the article to the categories or labels in Blogger
3- Create a custom permalink for your blogger article
4- Choose an picture for the article and how to form an select picture
Google AdSense:
And an advertising program belonging to Google that allows website owners to place Adsense ads on their sites through it, and the ads vary in form, either they are text ads, image ads, or video ads, and these ads serve advertisers who have contracted with Google in advance, so that displays Google their ads for a fee that Google shares with the owners of the sites where the ads appear. Ads are paid for either by counting the number of per-clicks made by visitors or by counting the number of times the ad appeared on the advertised site's per-impression.
How does AdSense work?
- website google owners register an application for an AdSense account for the purpose of displaying ads for Google on their sites.
- Google reviews the request and determines if the site matches Google's advertising policy.
- If the site is approved, the site manager who has become a subscriber to the AdSense program can obtain a Java code to display Adsense ads on his site.
- Companies contract with Google to display their ads on the sites shared in the AdSense program.
- Google searches the common sites with it for topics suitable for the fields of the advertised companies.
- Google shows companies' ads on relevant sites.
create google adsense account:
Step by step instructions to make your record.
- Click Get begun.
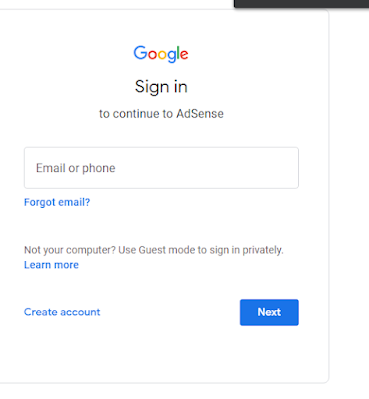
- Sign in to your Google Account.
- Pick whether you'd like AdSense to send you tweaked help and execution ideas. ...
- Select your installment nation or region. ...
- Audit and acknowledge the AdSense Terms and Conditions.
- Click Start utilizing AdSense.
The practical steps are as follows

Add your website:
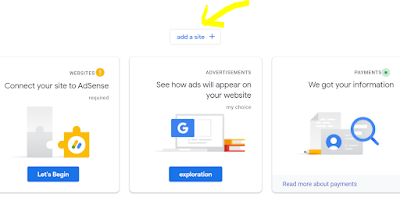
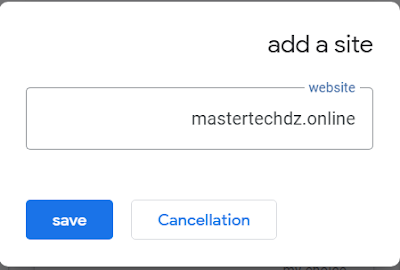
Connect your website.


